How to Write an Effective Blog Post
Writing a blog post can be one of the best ways to market your business. Not only does it allow you to inform people about your products, but it also allows you to connect with the people who read your blog. It gives you a great opportunity to establish yourself as someone who knows their stuff, generate leads and drive traffic to your website.
However, blogging is not just posts and promotion. You also want to make sure that your posts are effective and make an impact on the reader. Long-form content scores over short form content, so write an average of 1500 words for every blog post. Here are some tips for writing an effective blog post to increase your brand reputation and sales significantly. After examining the many blogging statistics given out by various agencies, here is what matters most in creating content that converts.

Elevate Your Digital Presence
Ready to transform your content strategy? Our expert team delivers SEO-optimized blogs and powerful backlink strategies that drive real results.
Boost Your Content Strategy →Step 1: Understand Your Target Audience
Understand your target audience and the problem you are trying to solve for them. If you know your audience, you will be able to write directly to them and better help them achieve their goals. If you think about the problem they want your blog post to solve, it helps keep you on topic while writing. But first, come up with a name for your blog. This blog name generator could help.
Step 2: Research Keywords And Topics For Your Blog Post
You will want to research keywords and topics that are relevant to your target audience. There are a few ways to do this.

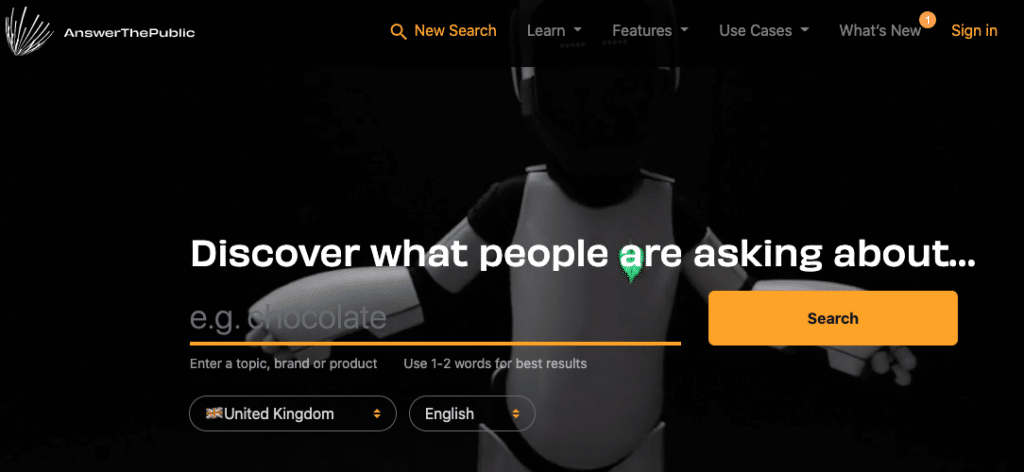
- Use a tool like AnswerThePublic to find relevant keywords and topics.
- You can also use Google Autocomplete to find relevant long tail keywords.
- You can use the related searches feature at the bottom of a Google search results page. This is another great way to get some ideas for additional keywords and topics you might want to cover in your blog post.

- Find a low-volume keyword, so the chances of ranking are higher. Use SEO tools like Keyword Tool, Ahrefs, Moz, Uber Suggest, or Wordtracker, among others.
Step 3: Choose A Unique Topic
Choosing a topic is probably the most important aspect of creating content for your business. Content can only be as good as the topic chosen.
This is where you should stand out from everyone else and make a difference by choosing topics that will engage the reader and benefit them in some way.
Topics are usually chosen based around the needs of the business rather than what would interest or benefit your audience. This is totally wrong! Write what the audience is looking for. If there is no demand for a specific topic, no point in writing a long piece and getting zero traffic.
Also remember to pick a topic that interests you. Make sure it’s something you really care about and are passionate about, otherwise it will lack authenticity and could negatively affect your credibility with your readers.
Step 4: Create A Powerful Headline
Step four: create a powerful headline. In a blog post, the headline is one of the most important elements of the piece. It not only helps you keep on track while writing, but it also serves as a guidepost to your readers.
The best headlines are short, specific and describe exactly what the content is about. Length-wise, it should be no more than two sentences long. While you don’t want your headline to be too short (a few words won’t tell your audience much), you also don’t want it to be too long either. A good rule of thumb is to aim for 6-12 words per headline. According to BuzzSumo, the soft spot is 11 words.
A good headline will usually contain keywords related to the content for search engines like Google to easily index the article when people search for them online.
Step 5: Design An Engaging Featured Image
Your featured image is the thumbnail that shows up in search results, in your social media feeds, and sometimes at the beginning of your blog post. This is an important piece of content to get right because it helps engage your audience from the get-go. If you want your users to click through to your blog post, you need something that’s going to grab their attention and make them want more.
Here are some tips for creating a strong featured image:
- Use relevant images
- Use images that are consistent with how you portray yourself online
- Use a consistent style for all of your featured images, so people can learn to identify you by look alone
Step 6: Write Great Content For Your Blog Post
When creating a blog post, the most important element is to write for your audience. No matter how you feel about it, an individual’s favourite reading material is going to be their own experiences and feelings—so you have to keep that in mind when writing.
You should also write for the right purpose. Sure, an article can serve multiple purposes: There are articles that urge people to buy something so they’ll get in on the newest trend; then there are articles that provide information about a certain topic so that people can use it as a reference point when deciding on their next purchase; and finally there are articles meant to be informative with no other function but simply serving as entertainment, making readers laugh out loud or going through the eyes of someone who’s been through what they’re going through.
Remember that every piece of content has a purpose, whether you make money from it or not—and since this is your website, you should always put your audience first.
Step 7: Use Internal Links (Where Appropriate)
Use internal links where appropriate. But what is an internal link? An internal link is a link from one page on your site to another page on your site. It’s a good idea to include internal links because they are not only useful for the reader but also help inform search engines about your site structure and can improve SEO rankings.
How do you choose which posts to link? The rule of thumb is linking to relevant content, but there are other things to consider as well. If you have too few internal links, this may indicate that your site content isn’t comprehensive enough. On the flip side, if you have too many internal links, it may get distracting for readers and be deemed low quality spammy content by Google.
Step 8: Optimise Your Blog Post With Outbound Links
Be sure to optimise your blog post with outbound links:
- Link to relevant articles and resources on other sites. You are also linking out to other sites for credibility and legitimacy, especially if you are referencing data or information that supports the material you are writing about in your blog post. Be sure to include a hyperlink in the text of the sentence where you mention this information.
- Link social media profiles and accounts. Be sure to link back to any social media properties as well as a “follow me” button or call-to-action that will encourage readers to follow you across various social networks, including signing up for email updates from your company.
- Link back to product pages and services pages. It’s important that readers have access directly from this page (your blog) back into all of the products/services offered by your company. The more ways they can get there, the better!
- Link back to portfolio or case studies (if applicable). Again, make it easy for readers who are interested in working with you or learning more about what you do — without having to hunt around too much for the information that makes sense for them at this point in their buying journey (i.e., pre-awareness).
Step 9: Add Sharing Buttons For Better Social Media Distribution
What good is all your hard work if it’s not getting read and shared by lots of people? To increase your blog post’s social media distribution, you need to make it easy for readers to share your content on the various social networks.
You can do this in a number of ways:
- Add sharing buttons at the end of each blog post.
- Remember that having too many sharing options will overwhelm readers, so limit the amount of social media buttons.
- Ensure that all the buttons are visible on both desktop, tablet and mobile devices for maximum effect.
- Experiment with different placement locations to see which works best for your audience (e.g., above or below content, floating at left side).
Step 10: Preview And Proofread The Blog Post Before Publishing
Read the whole blog post out loud before publishing it. This is called proofreading and you have to do it before you hit the publish button. If you find any spelling or grammatical errors, fix it. It is also important to check if all the images are working properly, if all your links are correct, and if your formatting is correct (like bullet points, headlines, subheadlines).
If you start writing a blog post with a certain length in mind, but realise that it is too short at the end of your writing session, add more relevant points. Be comprehensive. Don’t leave out any essential information.
Step 11: Do some SEO
You want your target audience to find your blog posts and read them through some nifty SEO. An easy way to ensure you’re using the right keywords is to write a headline first. Then include the keyword or phrase in these places:
- The first paragraph
- The last paragraph
- The URL
- Subheads (h1, h2, h3) throughout the post
- Alt text for images
Conclusion
It’s true that blogging is still a great way for your business to reach new customers, but you need to do it with strategy in order to get the most out of it. If you don’t have a plan, even the best blog post could fall flat on its face. In short, start preparing from the moment you think about starting a blog – because this takes some time. Whether you choose to do it yourself or outsource the work depends on how much time and money you can spare, but past experience has shown that it always pays off to make sure your marketing efforts are as effective as they can be. The more traffic you draw to your site, the better. Your website can be both informative and transactional. It’s a win-win strategy. So, if you don’t have the time to get into the nitty gritty of blog writing, get on a free email consultation with us. We will generate content that converts.
